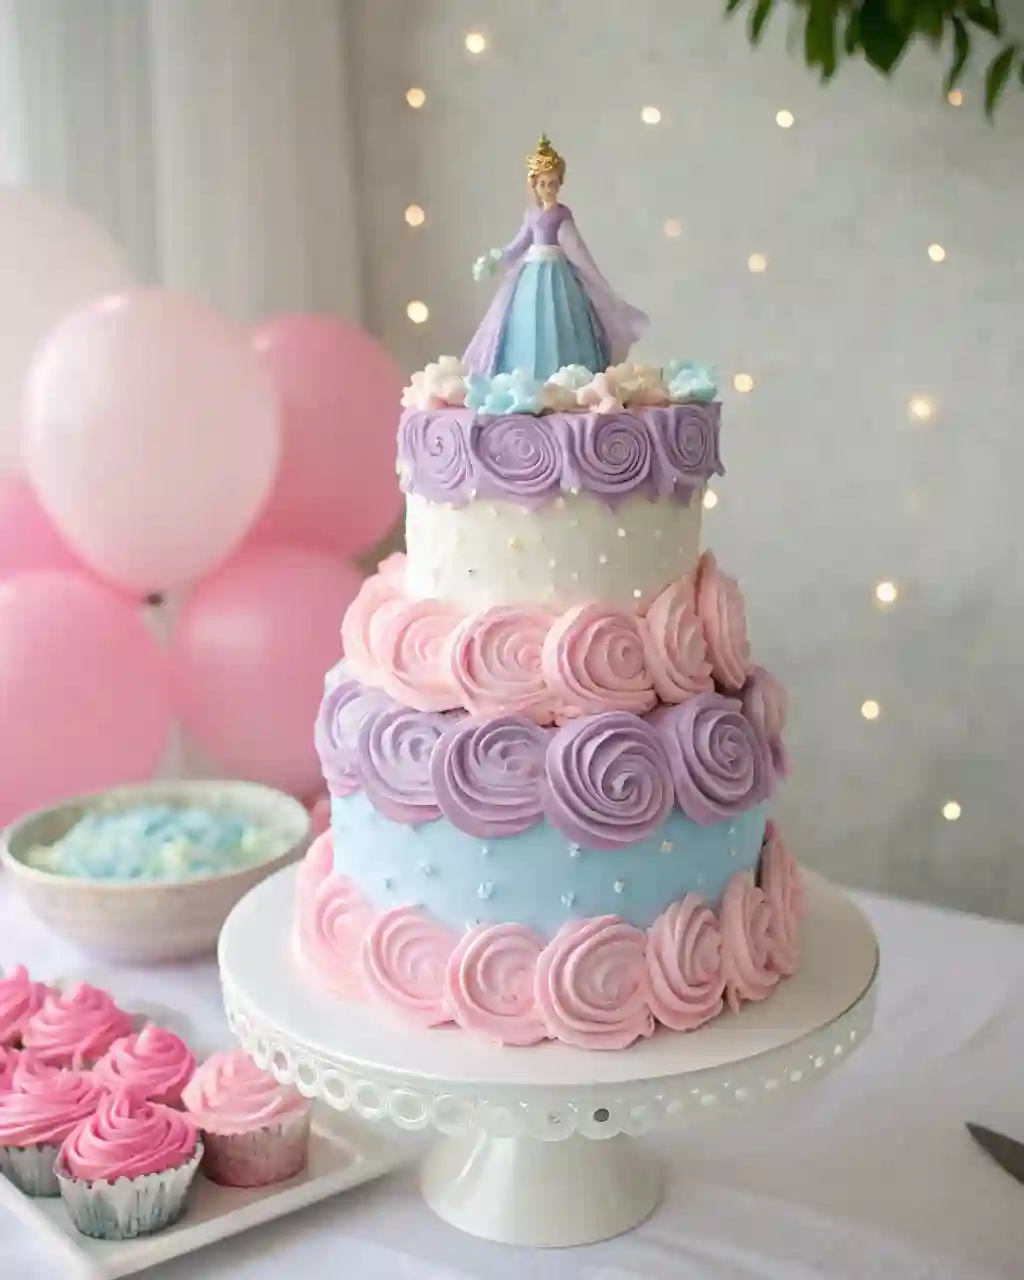
I’ll be honest — I didn’t get the whole “princess cake” obsession at first. That was, until I saw my niece tiara slightly crooked, frosting on her chin — light up when she spotted her Belle-themed cake on the table. It wasn’t just cake to her. It was the moment she became the princess.
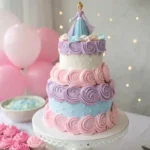
That’s the magic of a princess birthday cake. It’s not about tiers and fondant and edible glitter (okay, it kind of is). It’s about what it means — a centerpiece that turns a regular birthday into a full-on fairytale moment. It tells every little guest at the party that something special is happening, and it tells the birthday child, without saying a word: “You’re the main character today.”
Maybe you’re a seasoned cake decorator. Maybe this is your first time even thinking about baking one. Either way, you’re here for the same reason — to make a little magic. And spoiler: you don’t need a royal budget to do it. You just need a good plan, some creative fuel, and the right kind of inspiration.
So let’s get into it. From showstopping castle cakes to budget-friendly DIY options, we’re about to explore the world of princess birthday cakes in all its sugar-dusted, wand-waving glory.
Table of Contents
What You’ll Need: Ingredients for a Princess Birthday Cake
This one’s for a classic two-layer round cake — about 8 inches — which should feed around a dozen guests, give or take a few eager seconds.
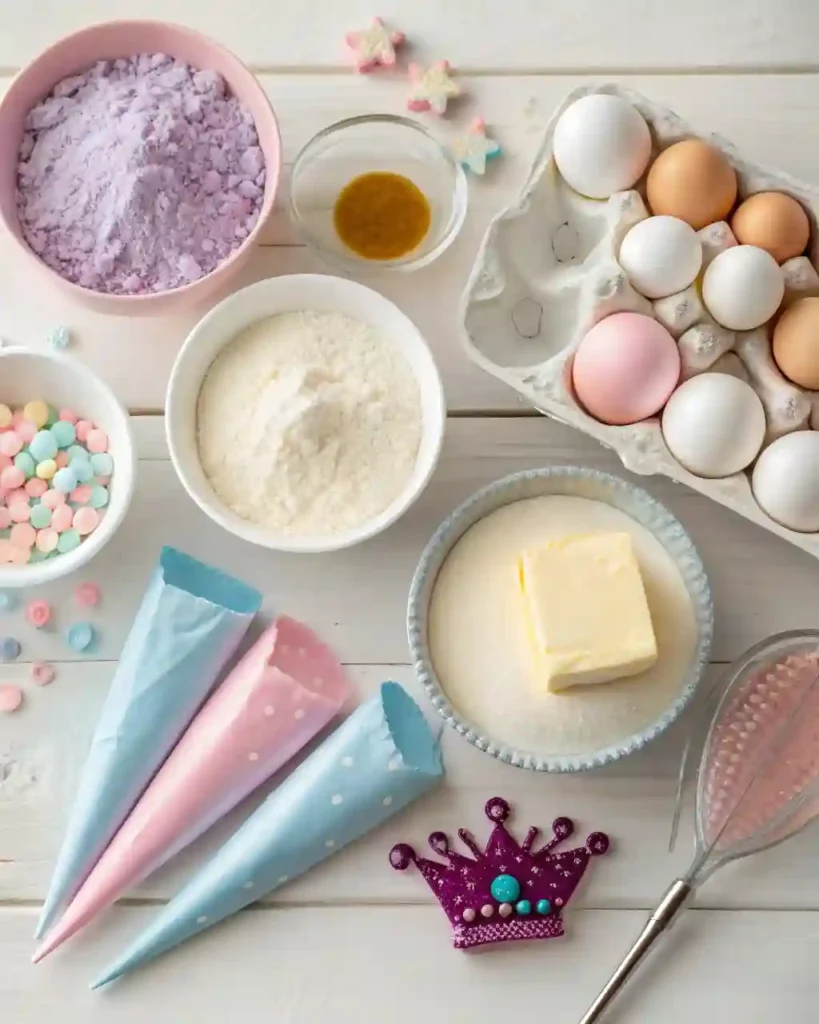
Cake Layers
- About 2½ cups all-purpose flour (spooned and leveled — trust me, don’t pack it)
- 2½ teaspoons baking powder
- ½ teaspoon baking soda
- Pinch of salt (I usually go with a heavy pinch)
- 1 cup (that’s two sticks) of unsalted butter — softened, not melted
- 1¾ cups white sugar
- 4 eggs — room temp if you remember
- A full tablespoon of vanilla extract (don’t skimp — this is the flavor star)
- 1 cup whole milk — or whatever milk you’ve got (oat works fine too)
Buttercream Frosting
- 1½ cups of unsalted butter — again, soft, not oily
- About 5 cups powdered sugar (start slow, then build)
- 2 to 3 tablespoons of cream or milk, depending on texture
- 1 tablespoon vanilla
- Gel food coloring — pink, lavender, sky blue… whatever fits the fairytale
- Small pinch of salt (cuts the sweetness if you’re not into ultra-sugar bombs)
For Topping and Flair
- Edible glitter (because sparkle matters)
- Princess figurine or cake topper (plastic or sugar-based)
- Sprinkles, sugar pearls, or fondant shapes (crowns, hearts — have fun)
- Optional: piping bags, star tip, round tip, and a big dash of patience
Allergy Swaps (Optional But Lifesaving)
- Gluten-free? Sub in a 1:1 flour blend (Cup4Cup or King Arthur are solid).
- No dairy? Use plant-based butter and oat milk — still tastes great.
- Egg-free? Try flax eggs or unsweetened applesauce — not perfect, but surprisingly okay.
How to Make a Princess Birthday Cake (Without Losing Your Mind)
You don’t need to be a pastry wizard. Just follow along — one step at a time — and remember: the goal isn’t perfection, it’s delight. Frosting can cover a multitude of sins.
Step 1: Prep Time
Preheat your oven to 350°F (yep, classic). Grab two 8-inch round cake pans, grease ‘them well — or use parchment paper if you don’t want to fight the stickiness later. Honestly, parchment makes cleanup less annoying.
Step 2: Mix the Batter
- First, mix all the dry stuff in one bowl: flour, baking powder, baking soda, and a little salt.
- In another (larger) bowl, cream your butter and sugar. It should look fluffy, pale, and kind of dreamy after a few minutes.
- Crack in your eggs — one at a time. Mix. Scrape. Repeat.
- Pour in the vanilla. Deep breath — it smells like cake now.
- Alternate pouring in your dry mix and milk. Don’t rush it. Don’t overbeat it either. Smooth and done.
Step 3: Bake It
- Split the batter between your pans as evenly as your eyes can manage.
- Into the oven they go for 30 to 35 minutes. Set a timer. Check with a toothpick — no wet batter = success.
- Let them cool in the pan for 10 minutes. Then flip them onto a wire rack. Or a plate. Whatever’s clean.
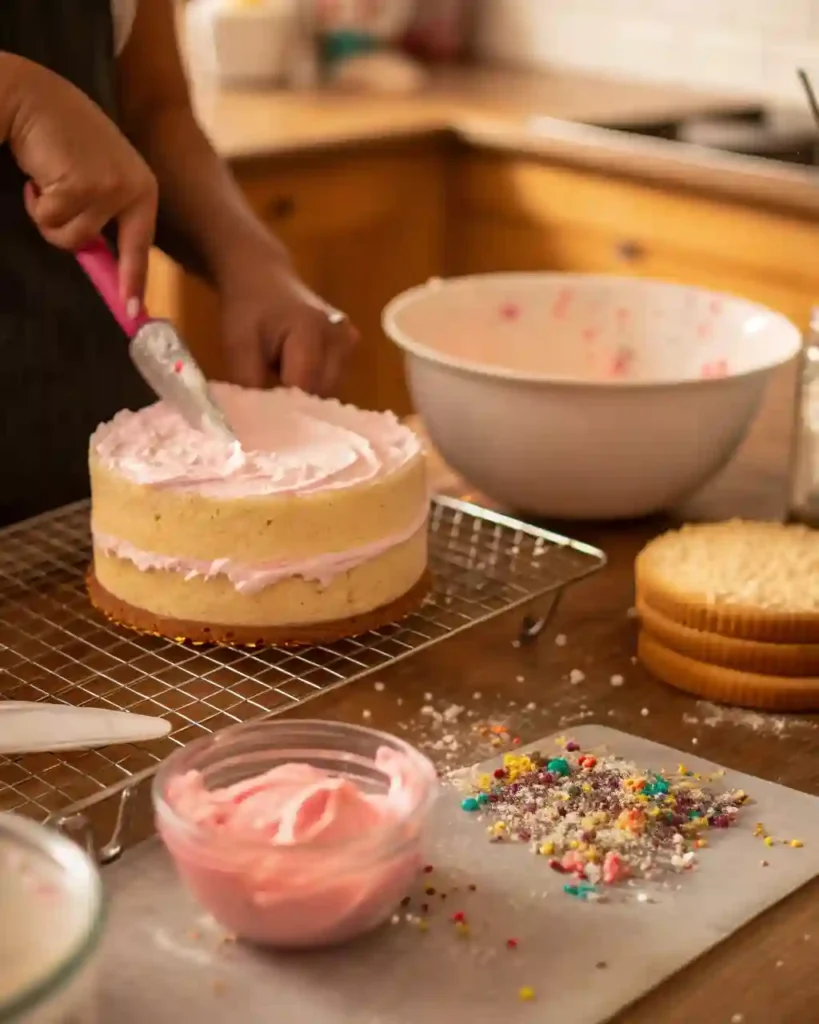
Step 4: Buttercream Magic
- Beat that butter until it looks fluffy. Then add powdered sugar slowly (you don’t want a sugar storm).
- Splash in vanilla. Add a little cream or milk till the texture feels right — not too stiff, not too runny.
- Divide it up and color it with food gel if you want — pink, purple, Frozen blue… your call.
Step 5: Build the Cake
- Level your cakes if they’re domed (serrated knife, deep breath).
- Stack the first layer, spread frosting, then the second.
- Apply a crumb coat (super thin frosting layer), chill it. 20 minutes is good.
- Final coat goes on next — thick, smooth, or ruffly, however you feel.
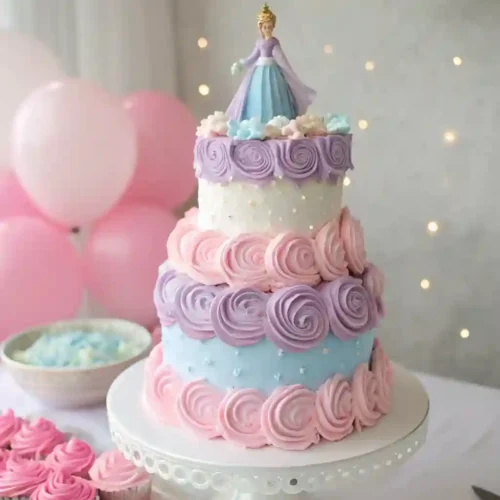
Step 6: Decorate, Then Step Back and Admire
- Pipe borders, swirls, anything. Add glitter, pearls, sprinkles.
- Crown your creation with a princess topper. Bonus points if she’s wearing frosting shoes.
- Don’t stress. It’s supposed to be fun. And imperfect cakes? Totally on brand for real-life royalty.
Budget-Friendly Tips for a Royal Cake
Let’s just say it — not every parent has a bakery budget. And that’s okay. Actually, scratch that — that’s more than okay.
Spend smart, not big
- Start with a plain store cake and dress it up
- Use dollar store toppers and tiaras
- Stick with buttercream over fondant
- Prioritize “wow” over size
If you splurge, make it on one thing: a quality topper, cake board, or fancy edible accent.
Catering to All: Allergy-Friendly and Dietary Alternatives
Princess cakes should be safe for everyone at the party. Food allergies? They don’t have to mean compromise.
Smart swaps
- Gluten-free: Use 1:1 blends or almond flour
- Dairy-free: Oat or almond milk, vegan butter
- Egg-free: Applesauce, flax eggs, commercial replacers
- Nut-free: Stick to basics — classic vanilla, clean frosting
Wrapping Up the Magic: Your Princess Cake, Your Way
At the end of the day — after the candles are blown out, the tiara’s slightly askew, and frosting’s in someone’s hair — it’s not really about the cake. It’s about her moment. That feeling of being seen, celebrated, and just a little bit magical.
Whether it was a tiered castle, a sheet cake with sprinkles, or something in between — you made a memory. That’s the royal win.
Princess Birthday
Ingredients
Cake Layers
- About 2½ cups all-purpose flour spooned and leveled — trust me, don’t pack it
- 2½ teaspoons baking powder
½ teaspoon baking soda
- Pinch of salt I usually go with a heavy pinch
- 1 cup that’s two sticks of unsalted butter — softened, not melted
1¾ cups white sugar
- 4 eggs — room temp if you remember
- A full tablespoon of vanilla extract don’t skimp — this is the flavor star
1 cup whole milk — or whatever milk you’ve got (oat works fine too)
Buttercream Frosting
- 1½ cups of unsalted butter — again soft, not oily
- About 5 cups powdered sugar start slow, then build
2 to 3 tablespoons of cream or milk, depending on texture
- 1 tablespoon vanilla
- Gel food coloring — pink lavender, sky blue… whatever fits the fairytale
Small pinch of salt (cuts the sweetness if you’re not into ultra-sugar bombs)
For Topping and Flair
- Edible glitter because sparkle matters
- Princess figurine or cake topper plastic or sugar-based
Sprinkles, sugar pearls, or fondant shapes (crowns, hearts — have fun)
- Optional: piping bags star tip, round tip, and a big dash of patience
Instructions
Prep Time
- Preheat your oven to 350°F (yep, classic). Grab two 8-inch round cake pans, grease ‘em well — or use parchment paper if you don’t want to fight the stickiness later. Honestly, parchment makes cleanup less annoying.
Step 2: Mix the Batter
- First, mix all the dry stuff in one bowl: flour, baking powder, baking soda, and a little salt.
- In another (larger) bowl, cream your butter and sugar. It should look fluffy, pale, and kind of dreamy after a few minutes.
- Crack in your eggs — one at a time. Mix. Scrape. Repeat.
- Pour in the vanilla. Deep breath — it smells like cake now.
- Alternate pouring in your dry mix and milk. Don’t rush it. Don’t overbeat it either. Smooth and done.
Step 3: Bake It
- Split the batter between your pans as evenly as your eyes can manage.
- Into the oven they go for 30 to 35 minutes. Set a timer. Check with a toothpick — no wet batter = success.
- Let them cool in the pan for 10 minutes. Then flip them onto a wire rack. Or a plate. Whatever’s clean.
Step 4: Buttercream Magic
- Beat that butter until it looks fluffy. Then add powdered sugar slowly (you don’t want a sugar storm).
- Splash in vanilla. Add a little cream or milk till the texture feels right — not too stiff, not too runny.
- Divide it up and color it with food gel if you want — pink, purple, Frozen blue… your call.
Step 5: Build the Cake
- Level your cakes if they’re domed (serrated knife, deep breath).
- Stack the first layer, spread frosting, then the second.
- Apply a crumb coat (super thin frosting layer), chill it. 20 minutes is good.
- Final coat goes on next — thick, smooth, or ruffly, however you feel.
Step 6: Decorate, Then Step Back and Admire
- Pipe borders, swirls, anything. Add glitter, pearls, sprinkles.
- Crown your creation with a princess topper. Bonus points if she’s wearing frosting shoes.
- Don’t stress. It’s supposed to be fun. And imperfect cakes? Totally on brand for real-life royalty.
Notes
Nutrition Information (Per Serving)
- Calories: 310 kcal
- Total Fat: 14g
- Saturated Fat: 9g
- Cholesterol: 50mg
- Sodium: 190mg
- Total Carbohydrates: 43g
- Sugars: 28g
- Dietary Fiber: 1g
- Protein: 3g
🗂️ Recipe Classification
- Course: Dessert
- Cuisine: American
- Diet: Traditional (Allergy-friendly options available)
- Method: Baking
- Keyword(s): princess birthday cake, DIY kids cake, party dessert, buttercream cake
- Skill Level: Beginner to Intermediate
FAQs
I’ve never decorated a cake — is this even doable?
Honestly? Yes. Start with a basic round cake, smooth on some pink frosting, toss a toy tiara on top, and bam — instant princess vibe. You don’t need pro skills. Just go slow, and don’t overthink it.
Do I have to use fondant? I kind of hate it.
Nope. You’re not alone. Most kids (and adults) prefer buttercream anyway. It’s easier, tastier, and way less frustrating to work with. You can totally get a royal look using just piping and some sparkly sprinkles.
How far ahead can I prep this cake without it drying out?
If you’re baking from scratch, bake the layers a day or two early — just wrap and chill. Frost the day before the party for best results. If you’re using a boxed mix, same rules apply. And hey, if you have to freeze it, just do the layers, not the decorations.
What cake flavor is the safest bet for picky eaters?
Vanilla. Always vanilla. Or maybe funfetti if you want to jazz it up a bit. Chocolate’s a solid runner-up, but some kids are weird about it (don’t ask me why). Keep it simple unless you know the crowd.
How do I store it overnight without ruining the frosting?
Fridge it — gently. If it’s in a box, great. If not, drape plastic wrap lightly over the top without touching the frosting (a few toothpicks can hold it up). Let it sit out 30–45 minutes before serving so it softens a bit.